

This guide walks you through the essential steps to get Darkify Pro up and running — from installation to enabling dark mode on your website.
1. Installation #
After purchasing Darkify Pro, download the plugin file darkify-pro.zip from your ThemeAtelier Account
- Log in to your WordPress Admin Dashboard.
- Navigate to Plugins → Add New → Upload Plugin.
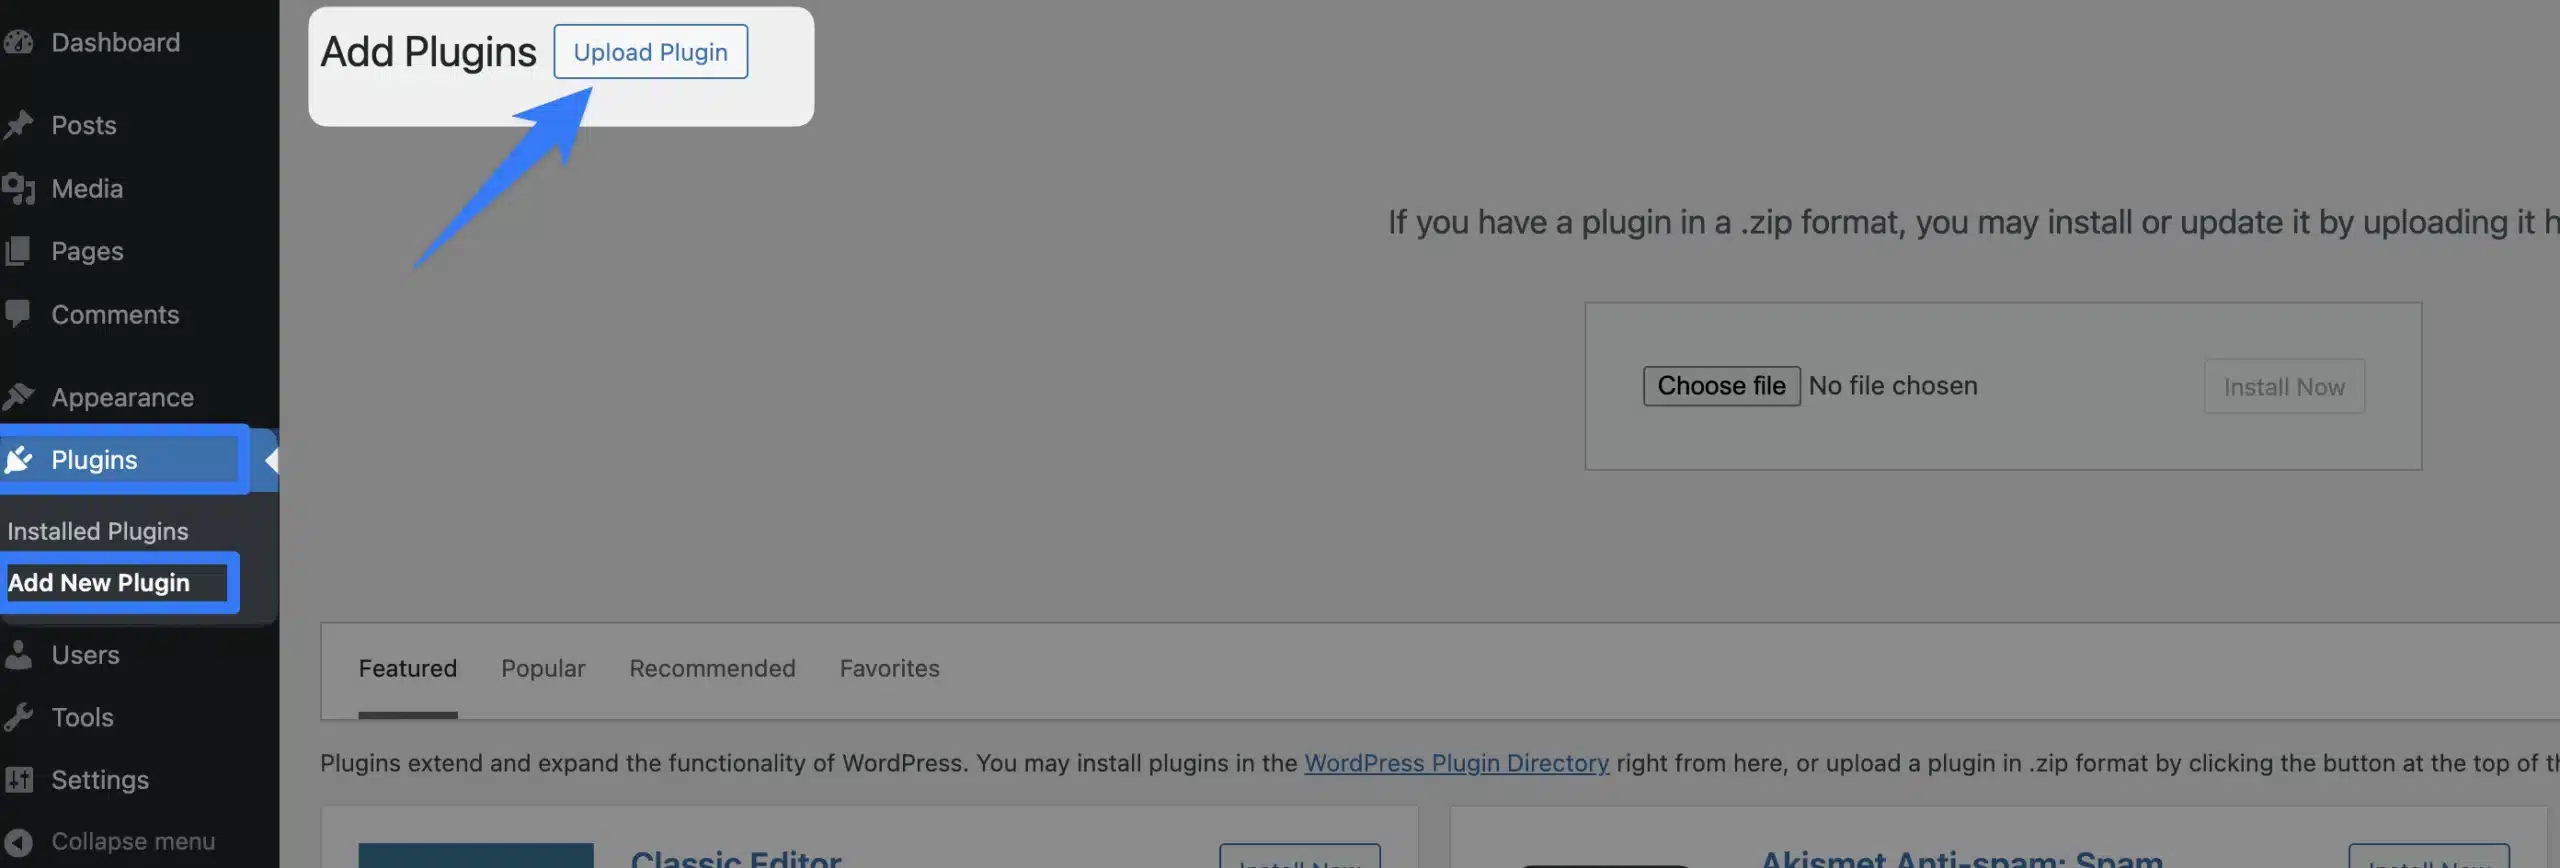
- Click the Upload Plugin button, choose the
darkify-pro.zipfile, and click Install Now.
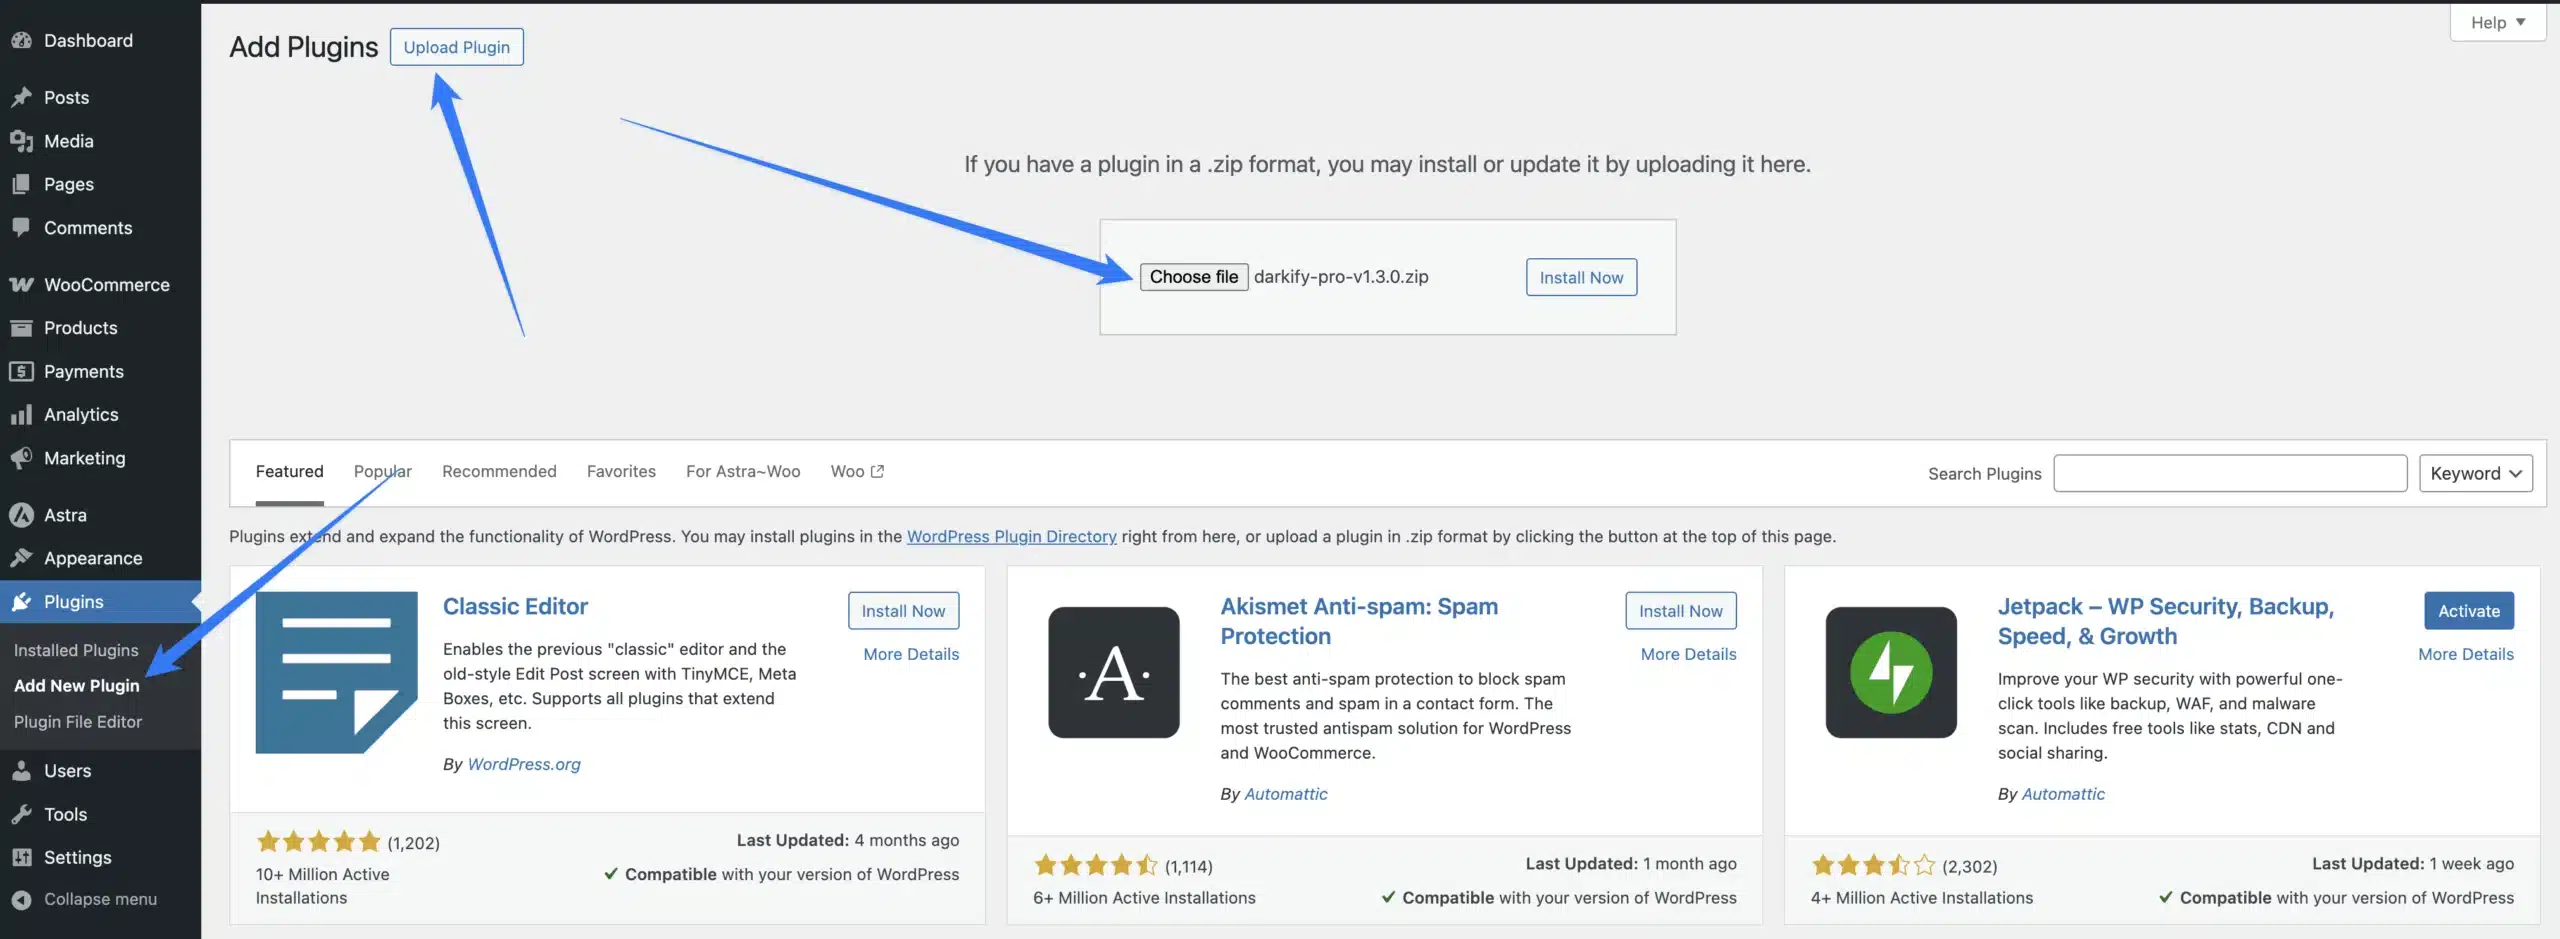
- After successfully installing the plugin, click “Activate Plugin “ to activate the plugin.

- Once installed, click Activate Plugin.
2. License Key Activation #
After activation, you will be redirected to the License Activation page.
- Copy your license key from your purchase email or ThemeAtelier Account.
- Paste the key into the License Key field.
- Click Activate.
Once the license is activated, you’ll begin receiving automatic updates and premium support.

3. Enabling Dark Mode (Frontend) #
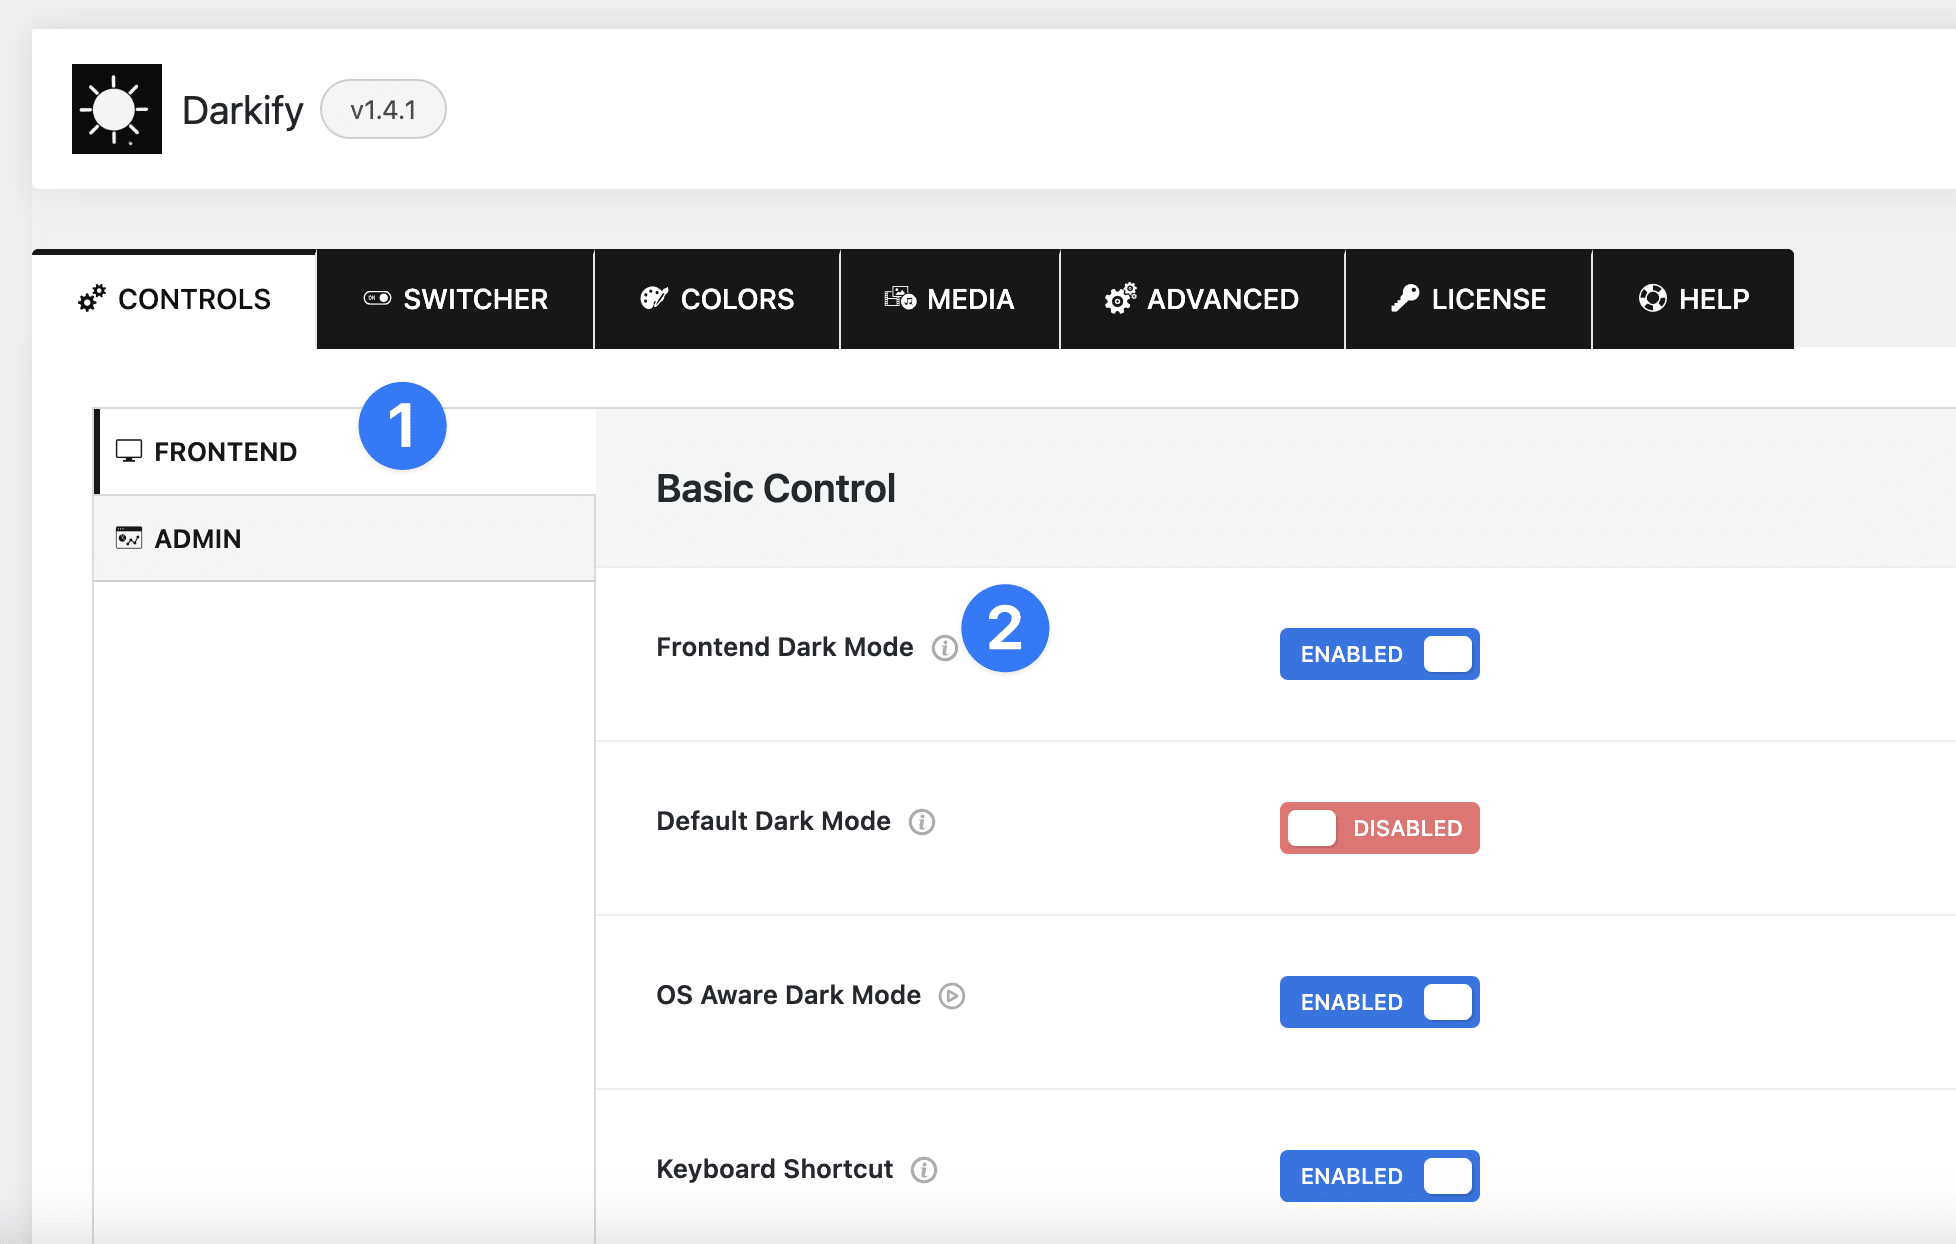
By default, frontend dark mode is enabled automatically. If you disable it, you can re-enable it anytime from the Controls → Frontend tab.
To enable dark mode on your site’s frontend:
- Go to Controls → Frontend – From the Darkify Pro settings panel, click on Controls, then select Frontend from the sidebar.
- Enable Frontend Dark Mode – In the Basic Control section, toggle the Frontend Dark Mode option to Enabled.
- Save Changes – Always click Save after making changes.
3. Enabling Dark Mode (Backend) #
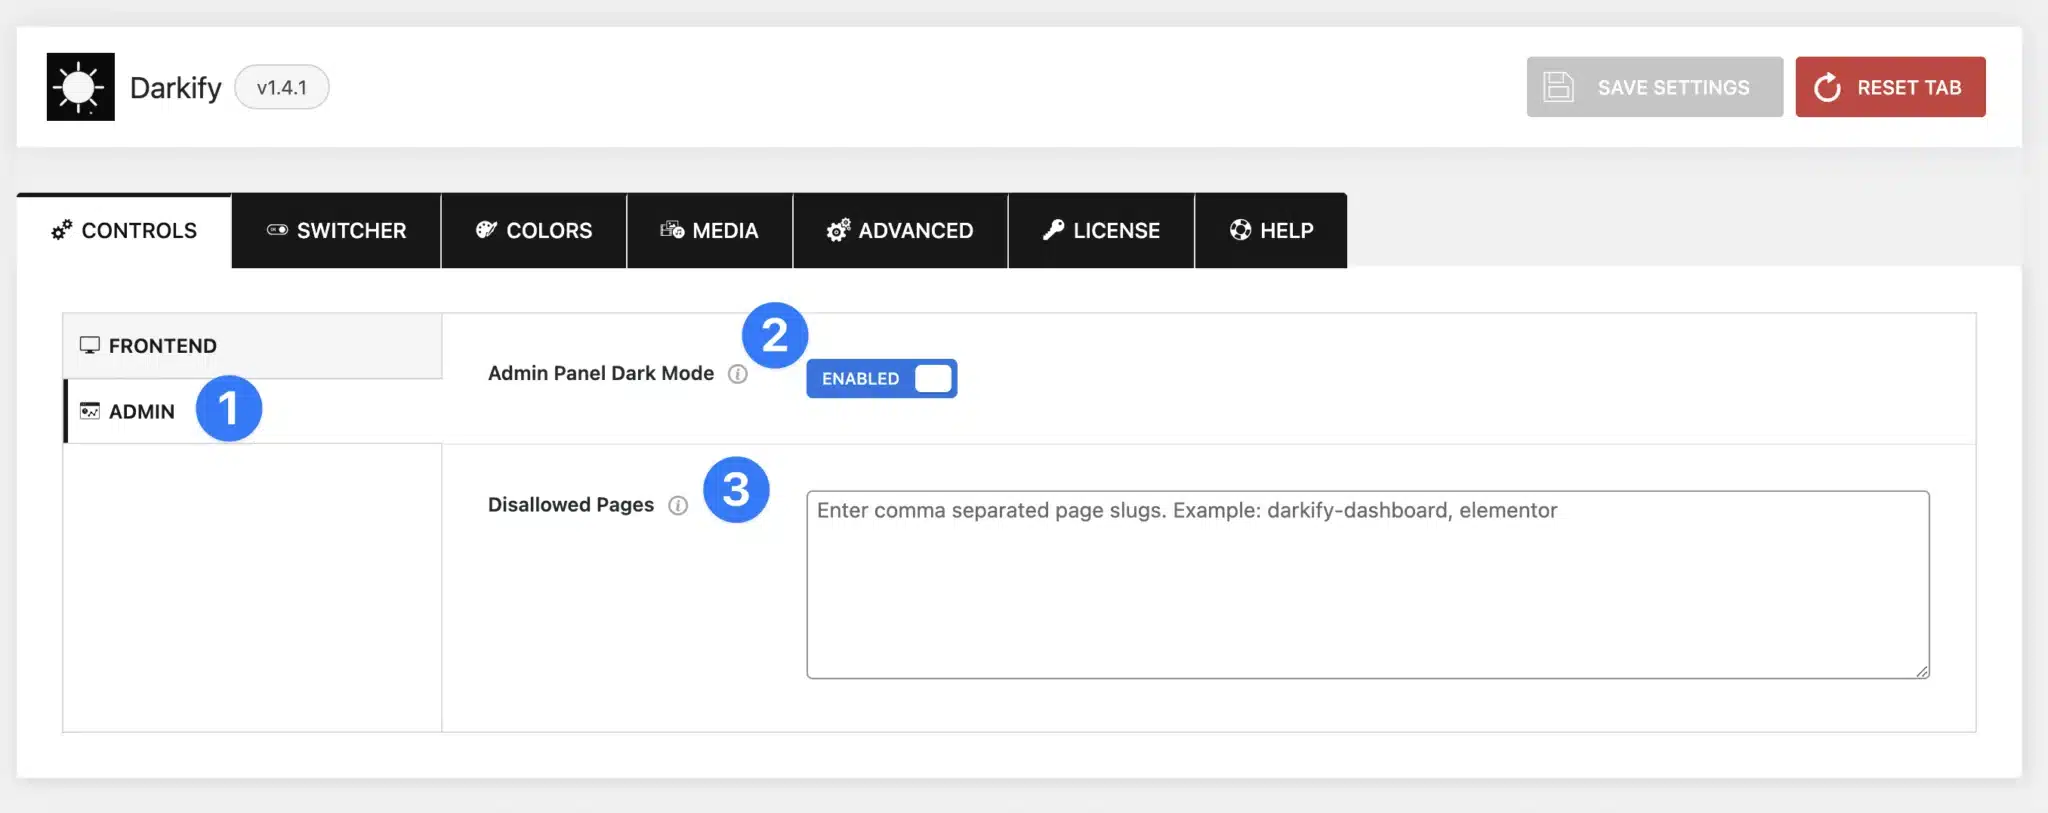
Darkify Pro allows you to enable dark mode inside your WordPress Admin Dashboard for a more comfortable editing experience.
- Go to Controls → Admin – From the Darkify Pro settings panel, select Controls, then click Admin in the sidebar.
- Enable Admin Panel Dark Mode – Toggle the Admin Panel Dark Mode option to Enabled. This will apply dark mode across your WordPress admin dashboard.
- Exclude Specific Pages (Optional) – In the Disallowed Pages field, enter a comma-separated list of admin page slugs you want to exclude from dark mode. Example:
darkify-dashboard, elementor


