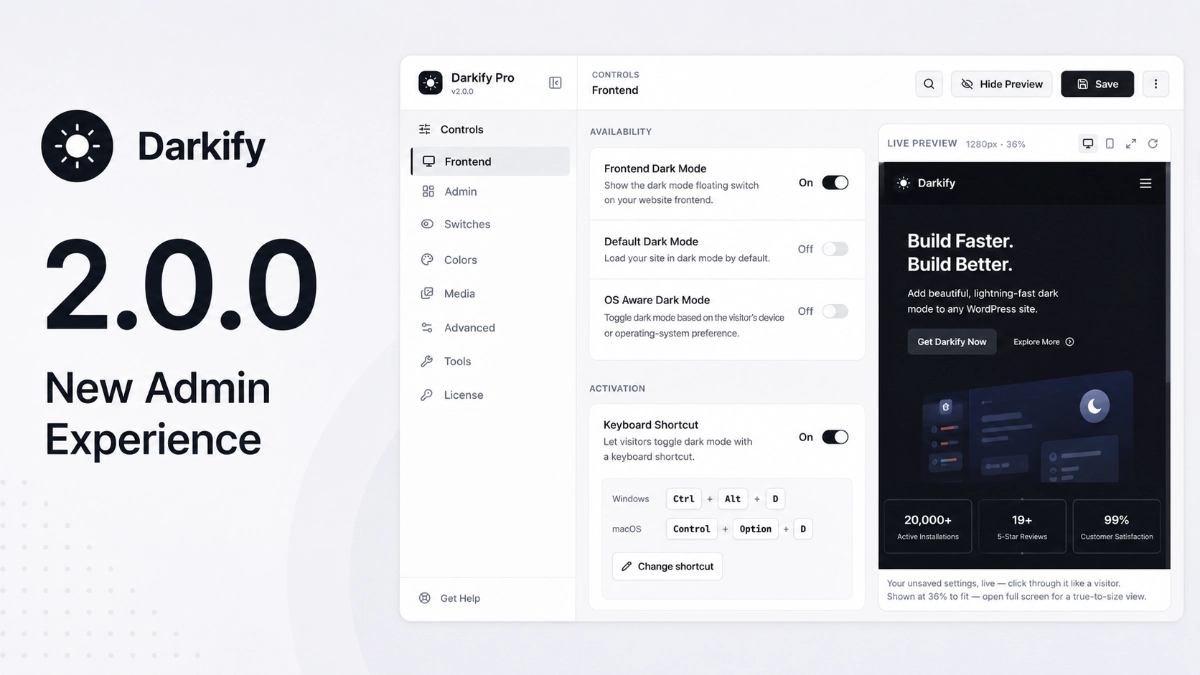
Darkify 2.0.0 is now available, and it changes more about how you configure dark mode than any release before it. The old settings screens are gone, replaced by a modern React-powered interface built from the ground up. You’ll find a live preview of your site next to every setting, a command-style search that jumps straight to any option, and a handful of workflow changes that make configuring dark mode feel less like filling out a form and more like designing a page.
If you’ve used Darkify before, this update changes your day-to-day experience with the plugin. If you’re new here, this is the version we’d want you to start with.
Key Takeaways
- Darkify 2.0.0 replaces the old settings framework with a React-powered admin interface, with clearer navigation and faster screens.
- A new Live Preview panel shows your site updating as you change settings, before you save anything.
- Press Ctrl+K (Windows) or Cmd+K (Mac) to search and jump straight to any Darkify setting.
- Standalone toggle settings now save automatically, so you don’t need to click Save after every switch.
- Your existing Darkify configuration carries over automatically — there’s nothing to rebuild after updating.
- The rebuilt admin experience is included in both Darkify Free and Darkify Pro, with Pro-only options clearly marked.
Why We Rebuilt the Darkify Admin Experience
Darkify’s original settings framework did its job well for a long time. It’s what let us grow from a simple toggle plugin into something with real configuration depth: switch styles, color overrides, per-page rules, scroll bar handling, and more.
That growth is exactly why we rebuilt it. Every new feature meant another tab, another field, another scroll to find the right option. The interface that once felt complete started to feel crowded, and finding a specific setting took longer than making the actual change.
Rather than shipping another visual refresh on the same foundation, we rebuilt the admin experience around a modern React interface — the same approach behind many of WordPress’s own newer admin screens. That gave us room to add things the old framework couldn’t easily support: a live preview, instant search, and clear save confirmations among them. You can read the complete list of changes in the full Darkify 2.0.0 changelog if you want the technical detail.
Darkify 2.0.0 is the result: the same settings you already know, organized and presented in a way that scales as we keep building on the plugin.
A Tour of the New React-Powered Interface
Open Darkify after updating and the first thing you’ll notice is the new admin header, with your site name, plugin version, and quick links to help. Below it, a sidebar organizes every settings area into clear sections instead of a long row of tabs.
Each section groups related settings into cards, and every card includes a short description of what it actually controls — useful if you’re configuring Darkify on a client site you didn’t build, or one you haven’t touched in a while.
A few small details go a long way here. Save a setting and a toast notification confirms it, or tells you what went wrong instead of leaving you guessing. While a screen loads, you’ll see a placeholder layout rather than a blank page or fields popping in one at a time. Pro-only settings show a clear lock icon and PRO badge, so you always know what you’re looking at, whether or not you’ve upgraded.
None of this changes what Darkify does. It changes how quickly you can find a setting, understand what it affects, and confirm your change actually saved — and that matters more the more settings a plugin has.
See Your Changes Before You Publish Them: Live Preview
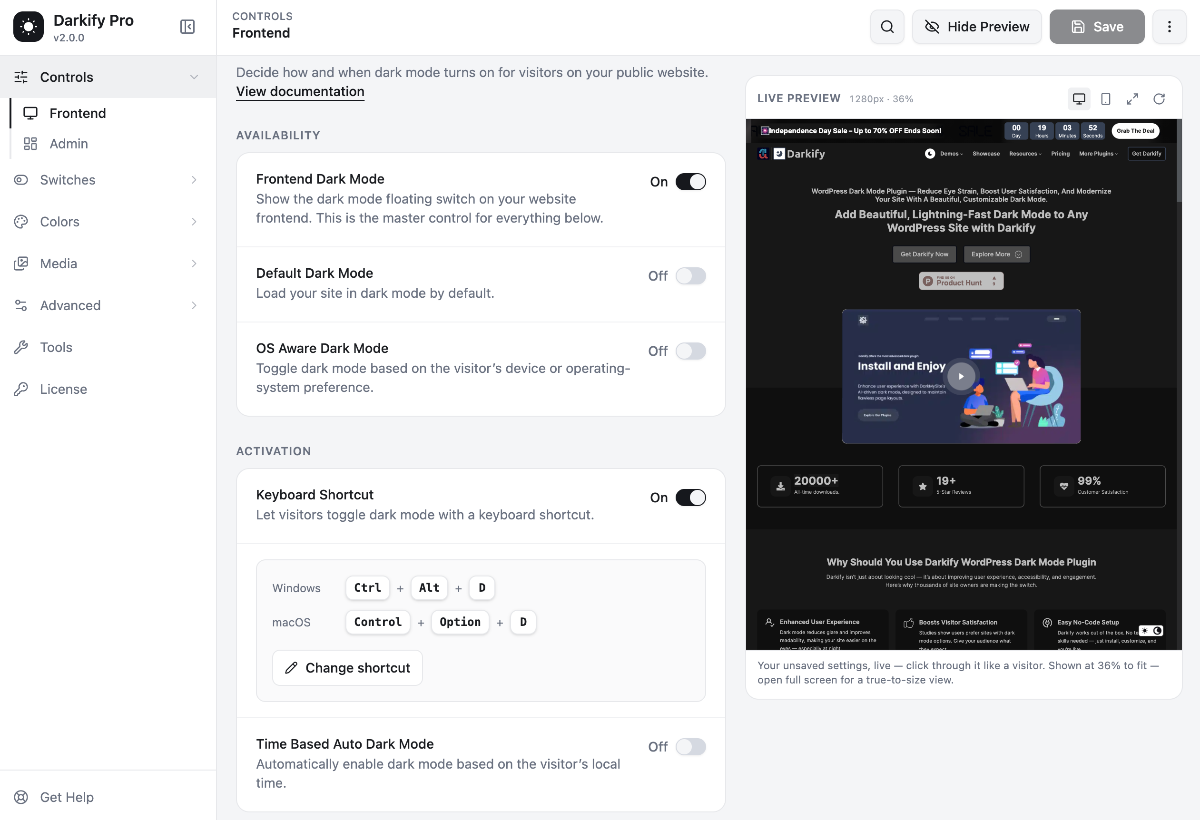
Of everything in Darkify 2.0.0, Live Preview is the change we think you’ll use the most. Instead of adjusting a setting, saving it, and opening your site in another tab to check it, Darkify now loads your actual website in a preview frame right next to the settings panel.
Change a color, adjust the switch style, or flip the Menu Switch setting, and the preview updates before you save anything. Don’t like what you see? Undo the change or try something else without ever publishing an in-between state to your live site.
You can switch the preview between desktop and mobile modes to check how a setting looks on a smaller screen, refresh it on demand, and expand it to full screen when you want to focus on how something reads. It’s the same site your visitors see, previewed with your unsaved changes layered on top.
For anyone who’s gone back and forth between a settings tab and a live site tab trying to get a switch color just right, Live Preview removes most of that back-and-forth. You make a visual decision by looking at the visual result.
Find Any Setting Instantly With Ctrl+K or Cmd+K
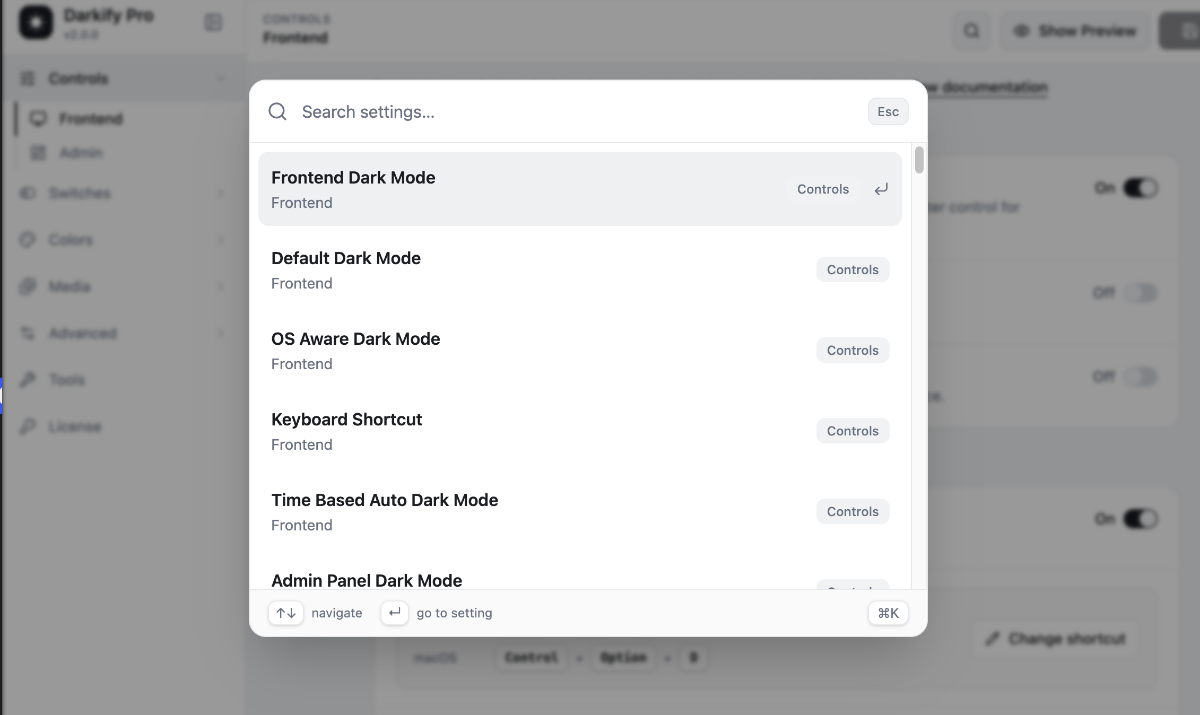
The more settings a plugin has, the more time you can lose just locating the one you need. Darkify 2.0.0 addresses this directly with a settings search you can open from anywhere in the interface by pressing Ctrl+K on Windows or Cmd+K on Mac.
Type something like “image brightness” or “floating switch,” and Darkify surfaces the matching settings immediately. Use the arrow keys to move through results and Enter to jump straight to the one you want. When you land on it, the field itself is highlighted, so you’re not left scanning the page to confirm you’re in the right place.
It’s a small feature with an outsized benefit for agencies and anyone managing Darkify across multiple client sites, where remembering which tab holds which setting isn’t always realistic.
Faster Navigation and a More Natural Saving Workflow
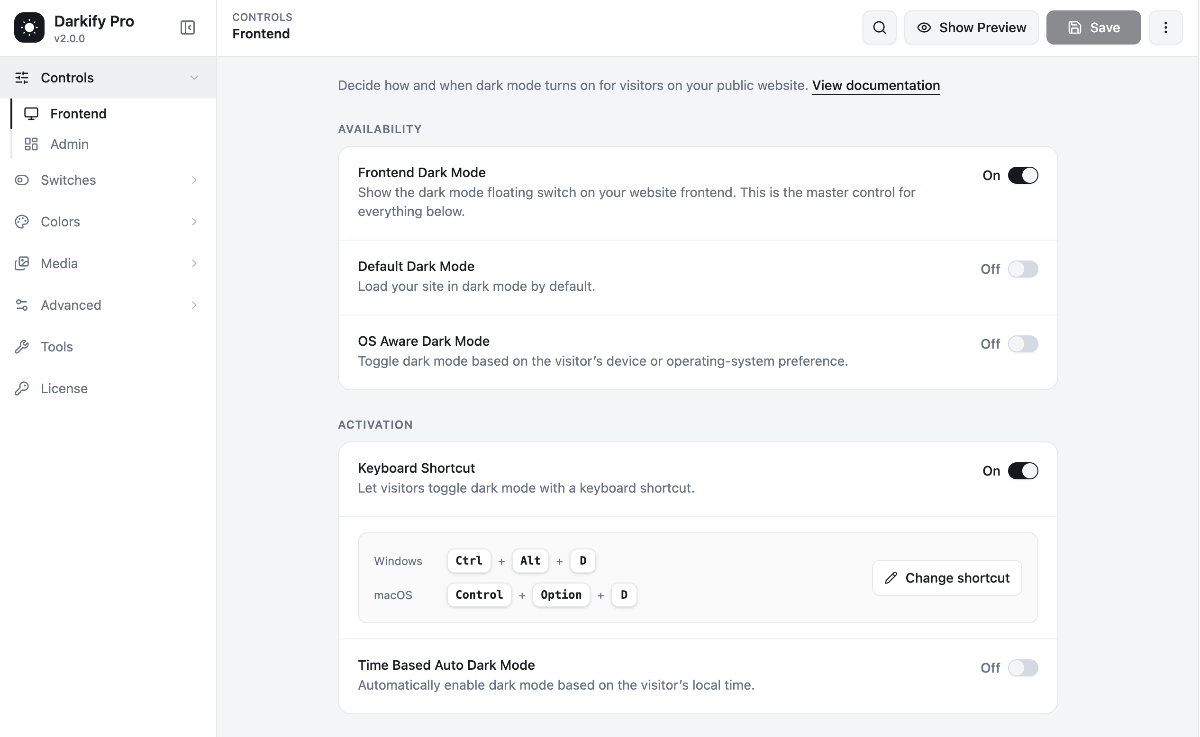
Beyond search, Darkify 2.0.0 changes how saving itself works. Standalone toggle settings now save automatically the moment you switch them, instead of requiring a separate click on Save. Flip a toggle, see the confirmation toast, and move on.
Settings that work together, like a group of related switch options, still go through the normal save flow, so you can review several related changes before committing them. Every save, automatic or manual, gives you immediate feedback through a toast notification, and errors are reported the same way instead of failing silently.
Navigating between sections is quicker too. Related settings are grouped under clear tabs, and options that only apply in certain configurations appear only when they’re relevant, so you’re not scrolling past fields that don’t apply to your setup. On smaller screens, that same navigation collapses into a slide-out drawer, so the admin remains usable on a phone or tablet when you need to make a quick change away from your desk.
Reset Controls, Backups, and a New Tools Page
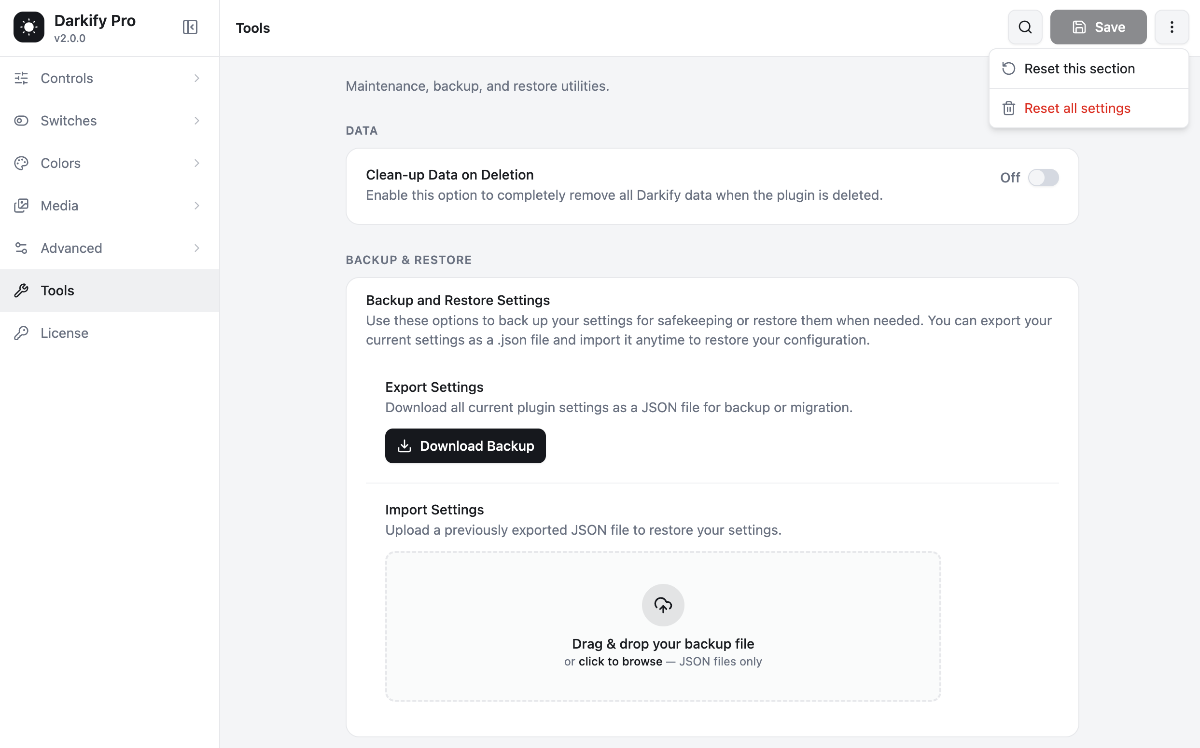
Darkify 2.0.0 also adds ways to manage your configuration itself, not just individual settings. If you want to start over on a single section, say, just the switch styling, you can reset that section alone without touching anything else you’ve configured. A confirmation dialog stands between you and any reset, so an accidental click doesn’t erase your work. Need a clean slate everywhere? A full reset option is available too, also behind a confirmation step.
The new Tools page adds a few things Darkify didn’t have before. Export lets you save your current Darkify settings as a JSON file, and Import lets you bring a saved configuration back in. That makes it easier to back up your setup before testing a big change, or move a configuration you like from a staging site to production. There’s also a Clean-up Data on Deletion option, so you control what happens to Darkify’s data if the plugin is ever removed.
More Visual Control Over Switches and Colors
Positioning the floating dark mode switch used to mean interpreting a set of position values. In Darkify 2.0.0, Switch Position is a visual corner picker instead: click the corner where you want the switch to sit, then fine-tune the margin for that specific corner.
Shortcode switches, the ones you place manually in content rather than the global floating switch, can now be styled completely on their own. Turn off “Use Global Switch Settings” on a shortcode switch, and you can give it its own size, color, and border independent of the floating switch elsewhere on your site.
Color fields throughout Darkify also got more flexible. You can enter a value as HEX, RGB, RGBA, HSL, or HSLA, pick it visually, or type it manually, and Darkify validates the value as you go, so you know immediately if something isn’t a usable color. That matters if you’re matching a brand guideline that specifies colors in a particular format rather than converting everything to HEX by hand.
A few smaller refinements round this out: the Dual switch style now supports separate text colors for light and dark mode, Switch Border has its own dark-mode border color, and the Alternative Dark Mode Switch setting validates your CSS selector as you type it, instead of only failing silently on the frontend.
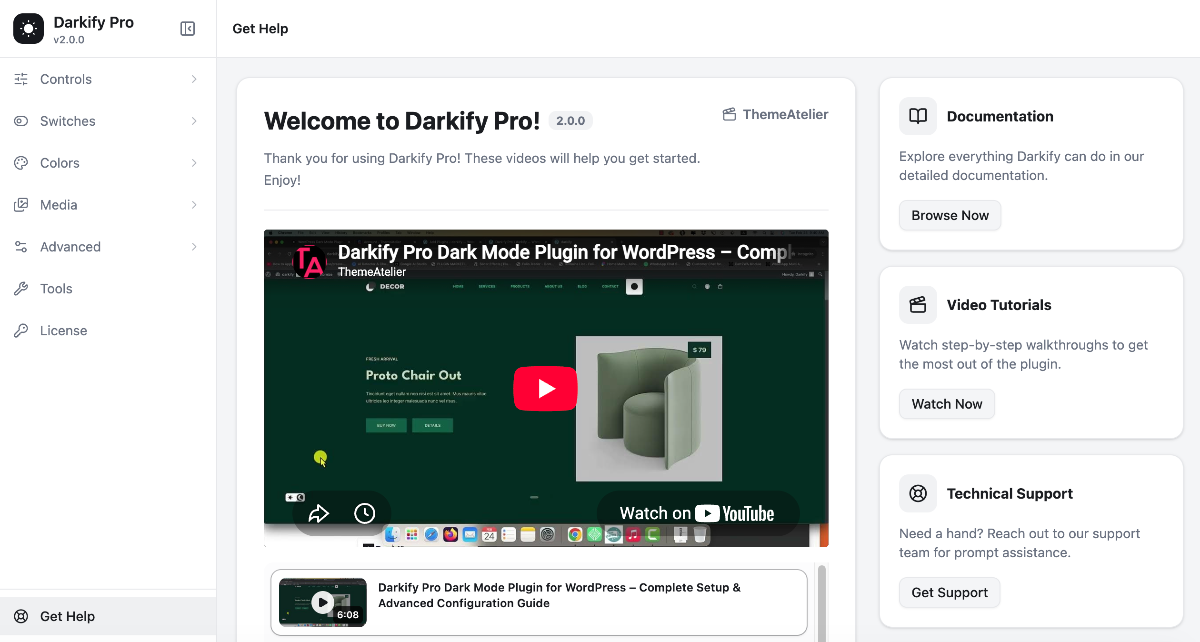
A Redesigned Get Help Experience
The Get Help page has also moved closer to where you’re actually working. Instead of leaving the settings screen to search the Darkify documentation, you’ll find four sections in one place: Get Started, including video tutorials for newer users; Recommended Plugins that pair well with Darkify; a Lite versus Pro comparison so you can see what upgrading actually adds; and a Pro Plugins section if you’re looking for other tools from the same team.
None of it requires leaving the admin area you’re already in, which matters most the first time you set up Darkify, or the first time you run into a setting you don’t recognize.
Performance and Compatibility Improvements
Darkify 2.0.0 includes a handful of under-the-hood improvements worth knowing about, even if they’re less visible than the new interface.
When Frontend Dark Mode is turned off, Darkify now loads no frontend CSS, JavaScript, or inline output at all, rather than loading a smaller footprint. Removing the retired settings framework and old help assets also made the overall plugin download smaller.
The admin interface itself feels more responsive too, thanks to loading placeholders that appear while a settings screen loads instead of a blank or half-rendered page. Compatibility got attention as well: Darkify now better recognizes admin screens from other plugins that already ship their own dark theme, reducing the chance of Darkify darkening something that’s already dark. Block Editor Dark Mode and Admin Panel Dark Mode are now independent settings, so enabling one doesn’t force the other, and default values resolve more reliably on fresh installs.
One practical note: the minimum supported WordPress version for Darkify 2.0.0 is now WordPress 5.5.
What Existing Users Need to Know Before Updating
If you’re already running Darkify, the most important thing to know is that your existing settings are preserved. Darkify 2.0.0 was built to carry your current configuration into the new interface, so there’s nothing to rebuild after you update.
A couple of specifics are worth calling out directly. If you had Dark Scroll Bar enabled, that preference carries over exactly as it was; the setting is simply switched off by default on brand-new installations going forward, not on sites already using it. Because the settings organization changed, some field locations have moved, but the values themselves haven’t.
As with any WordPress plugin update, we’d still recommend a routine backup before updating, and a quick pass through your main frontend, admin, and switch settings afterward just to confirm everything looks the way you left it. That’s standard update practice, not a sign this release needs extra caution.
Darkify 2.0.0 in Free and Pro
The rebuilt admin experience isn’t a Pro-only upgrade. Every Darkify Free user gets the same React-powered interface, Live Preview, settings search, and workflow improvements described in this post, no purchase required. You can grab the current version directly from the Darkify listing on WordPress.org.
What stays different is the feature set underneath it. Pro-only options are clearly marked with a lock icon and PRO badge throughout the new interface, so you can see exactly what’s available without hunting for it. If you’re a Free user who finds yourself wanting more control over colors, switch behavior, or advanced dark mode rules, the redesigned Get Help page now includes a direct comparison to help you decide whether Darkify Pro is worth adding.
How to Update to Darkify 2.0.0
Updating follows the same process as any other WordPress plugin update:
- Back up your site, as you normally would before any plugin update.
- Go to your WordPress Dashboard, then Plugins → Installed Plugins.
- Find Darkify (or Darkify Pro) in the list.
- Select Update Now.
- Open the new Darkify settings interface once the update finishes.
- Review your frontend, admin, and switch settings to confirm everything carried over as expected.
If you run Darkify Pro, make sure you update both the required Free/base plugin and Darkify Pro itself, since Pro depends on the base plugin being current.
Frequently Asked Questions
Update Today and See What’s Changed
Darkify 2.0.0 is available now from your WordPress dashboard, and it’s the version we’d recommend for every existing user. Update, open the new interface, and try Live Preview on your next settings change. It’s the fastest way to see what’s different.
If you’re on Darkify Free and want more control over colors, switch behavior, or advanced dark mode rules, take a look at what Darkify Pro adds.