
You can install Darkify in under two minutes, either from the WordPress plugin directory (free version) or by uploading the Pro ZIP file you received after purchase. Both methods are covered below.
Install the free version from your dashboard #
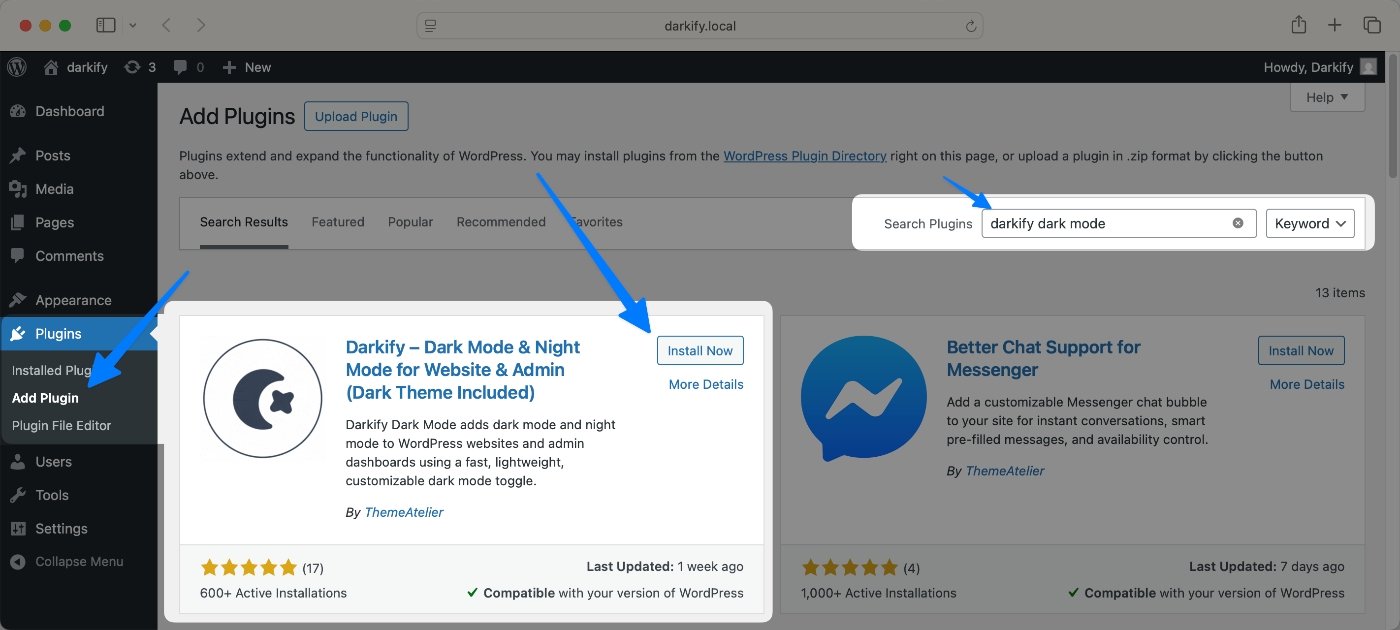
- Log in to your WordPress dashboard.
- Go to Plugins → Add New.
- Search for Darkify Dark Mode.
- Click Install Now, then Activate.
- A new Darkify item appears in your admin menu. Open it, and you are ready to configure.
Install Darkify Pro #
After you buy Darkify Pro, you receive an email containing your download link and your license key. You can also find both any time in your account area at themeatelier.net/account.
- Download
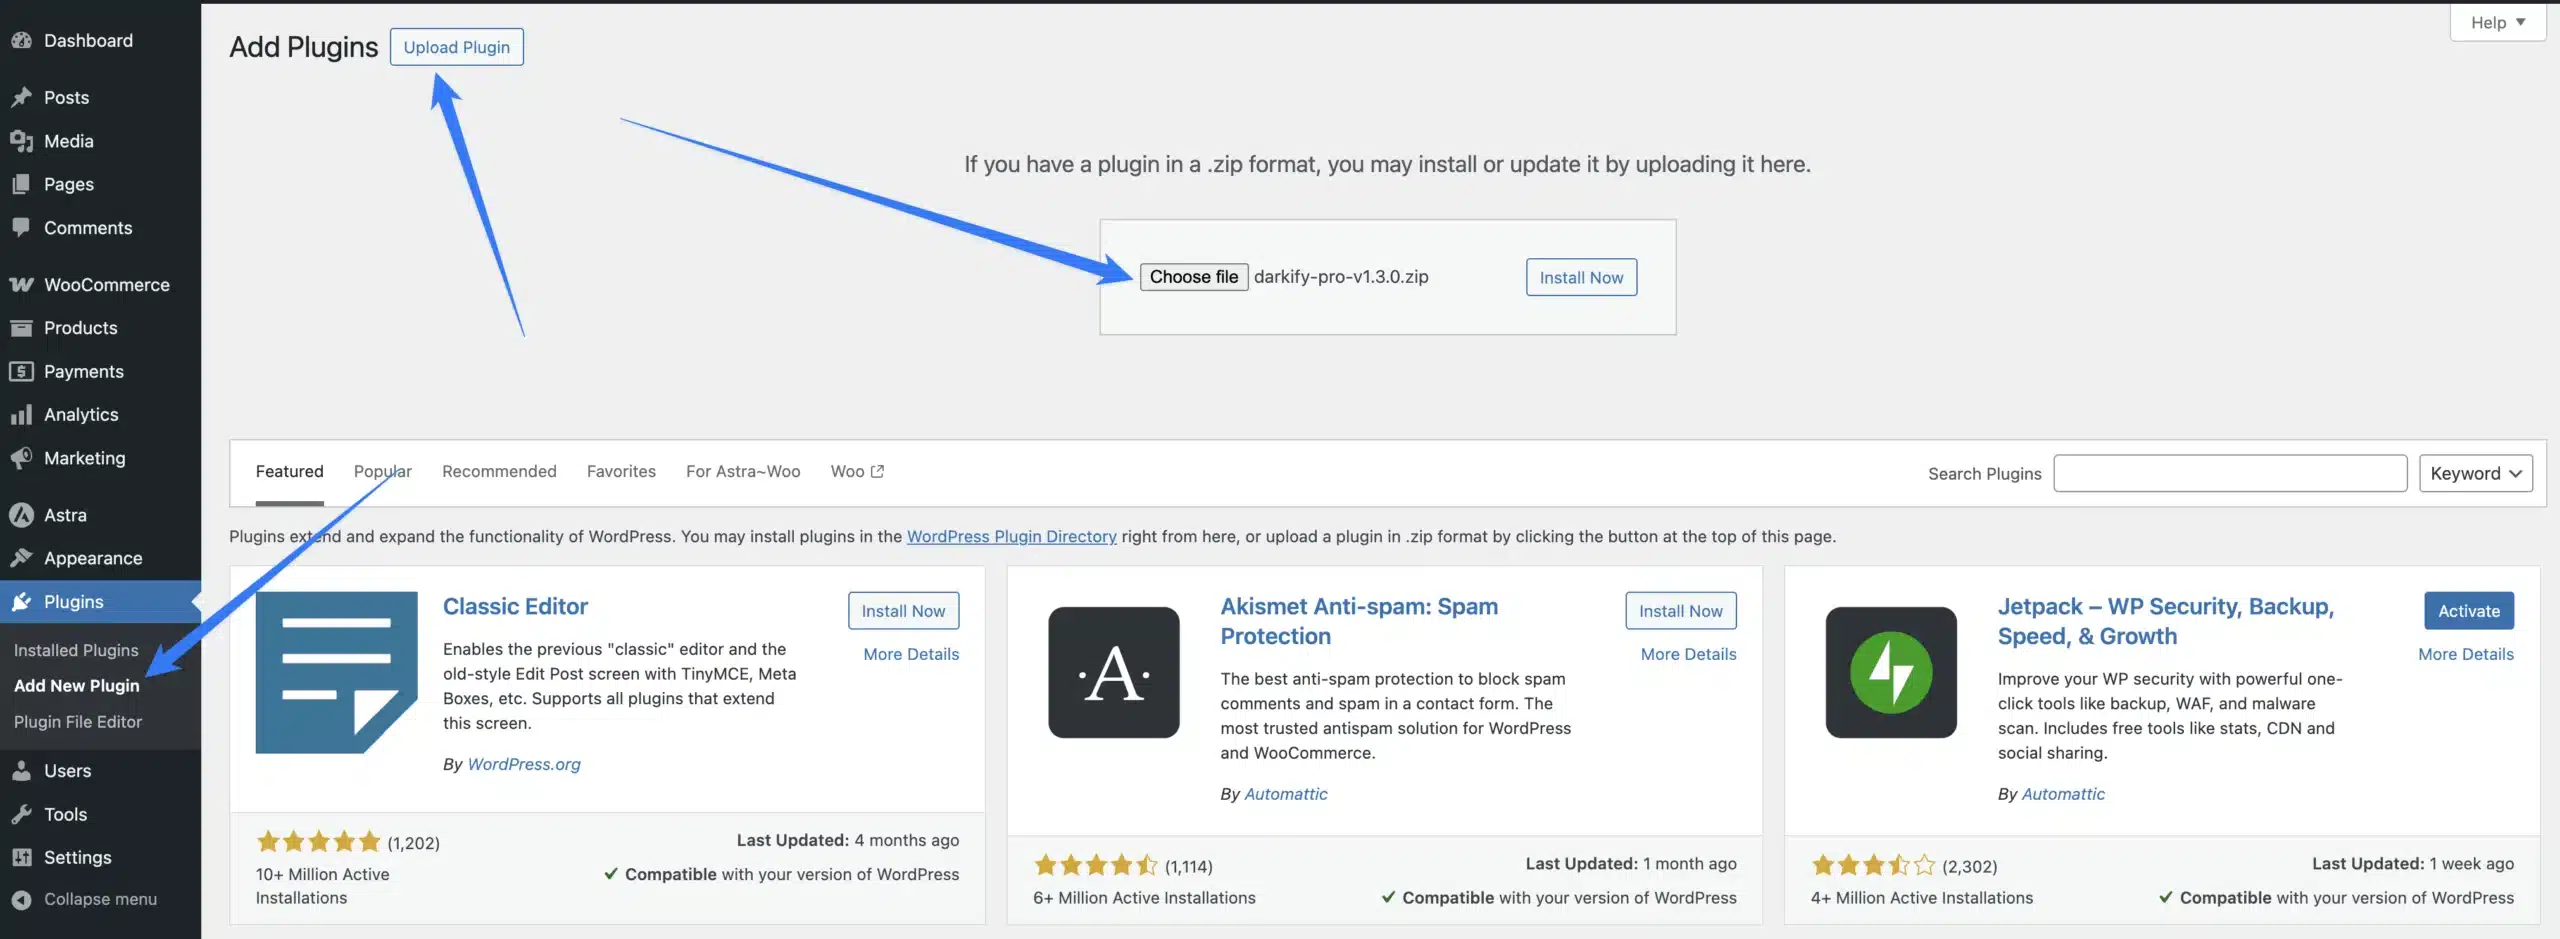
darkify-pro.zipfrom your account. Do not unzip it. - In WordPress, go to Plugins → Add New → Upload Plugin.
- Choose the ZIP file and click Install Now.
- Click Activate Plugin.
- Go to Darkify → License and activate your license key. Pro features stay locked until the key is active.
Do I need the free version installed too? No. Darkify Pro is a complete plugin. If you already run the free version, you can either deactivate and delete it first, or install Pro over it — your existing settings carry over either way.
Install manually over FTP #
Useful when your host limits upload size or the dashboard upload fails.
- Unzip
darkify-pro.zipon your computer. You get adarkify-profolder. - Connect to your server with FTP or your host’s file manager.
- Upload the folder to
/wp-content/plugins/. - In WordPress, go to Plugins and click Activate next to Darkify Pro.
Common installation messages #
| Message | What it means | Fix |
|---|---|---|
| “The uploaded file exceeds the upload_max_filesize directive” | Your host limits upload size. | Install over FTP instead, or ask your host to raise the limit. |
| “The package could not be installed. No valid plugins were found.” | The ZIP was unzipped before upload, or the wrong file was selected. | Re-download the original ZIP and upload it without extracting. |
| “Plugin could not be activated because it triggered a fatal error” | Usually an outdated PHP version. | Confirm PHP 7.1+ under Tools → Site Health, then retry. |
What happens right after activation #
Darkify starts with sensible defaults: frontend dark mode on, OS-aware detection on, the floating switch visible in the bottom-right corner, and the Carbon Mist colour preset applied. Visit your homepage and click the switch — you should see dark mode immediately.
From there, head to the admin panel tour to learn your way around.


